Difference between revisions of "Pretender Hephaestus"
Assasinat3r (talk | contribs) m (→Stages) |
Zerendalus (talk | contribs) (→Stage 2) |
||
| (25 intermediate revisions by 10 users not shown) | |||
| Line 1: | Line 1: | ||
| − | + | Pretender Hephaestus is an [[Uber AI|uber AI]] resting in [[Forge of Hephaestus]]. To face him however you must first brave his three Cyclopian guards, [[Brontes]], [[Arges]] and [[Steropes]]. Their ships were forged by Pretender Hephaestus himself and are out-fitted with powerful weapons - only those of fortitude may enter the forge. | |
| − | + | The bright suns and many asteroids in this area make fighting him nearly impossible for stealth classes. Coupled with a big nasty chain laser-wielding drone on the sun, how can anyone possibly defeat him!? | |
| − | + | Although Pretender Hephaestus is considered the weakest Olympus uber, Pretender Hephaestus is still hard, very hard, don't blink or you'll die several times over and get to watch from your pod as he melts your ship down to scrap and reforges the Cyclopian guards you killed to fight him - coincidentally, Steropes mentions this very thing right before he dies! | |
| − | + | Some of the features of Pretender Hephaestus' home include his very own [[Overloaders#Other_Overloaders|Hephaestus Forged Overloaders]]; these are decay-on-warp overloaders that can be mined from the inner asteroid belt. They're extremely powerful, and well worth the investment of time to mine, however they aren't necessary to kill Pretender Hephaestus. If you instead want to challenge a mini Cyclopes, then you need to mine in the outer asteroid belt, you may even find some bronze while you're getting butchered by them! | |
| − | + | == Stages == | |
| − | + | === Stage 1 === | |
| − | + | "Hephaestus" upon entering. | |
| − | |||
{| align="center" | {| align="center" | ||
| − | | | + | |- |
| − | |[[Image: | + | | [[Image:Forge of Hephaestus.png|500px]] |
|} | |} | ||
| − | + | === Stage 2 === | |
| + | |||
| + | 75%: "Hephaestus" in his second form, deploying Unstable Hephaestus Drones. | ||
| + | |||
{| align="center" | {| align="center" | ||
| − | | | + | |- |
| − | |[[Image: | + | | [[Image:Hephaestus Form 2.png]] |
|} | |} | ||
| − | + | === Stage 3 === | |
| − | 50%: | + | |
| + | 50%: "Hephaestus" in his third form with a new chain laser. | ||
| + | |||
{| align="center" | {| align="center" | ||
| − | | | + | |- |
| − | |[[Image: | + | | [[Image:Hephaestus Form 3.png]] |
|} | |} | ||
| − | + | === Stage 4 === | |
| + | |||
| + | 25%: "Hephaestus" in his final form. | ||
| + | |||
{| align="center" | {| align="center" | ||
| − | |[[Image: | + | |- |
| + | | [[Image:Hephaestus Form 4.png]] | ||
|} | |} | ||
| − | === | + | == Gear == |
| − | {| | + | === Tiers === |
| − | + | {| align="left" class="wikitable" | |
| − | |||
|- | |- | ||
| − | |bgcolor="grey"| | + | | bgcolor="grey" | '''Heavy''' |
| − | | | + | | Oversized |
|- | |- | ||
| − | |bgcolor="grey"|'''?''' | + | | bgcolor="grey" | |
| − | |Miniature | + | | Normal |
| + | |- | ||
| + | | bgcolor="grey" | '''?''' | ||
| + | | Miniature | ||
|} | |} | ||
| + | |||
{| class="wikitable" | {| class="wikitable" | ||
| − | |||
| − | |||
|- | |- | ||
| − | |bgcolor=" | + | | bgcolor="blue" | '''Tier 3''' |
| − | |bgcolor="grey"| | + | | bgcolor="grey" | ? |
| + | | bgcolor="grey" | Maul | ||
|- | |- | ||
| − | |bgcolor=" | + | | bgcolor="green" | '''Tier 2''' |
| − | |bgcolor="grey"| | + | | bgcolor="grey" | Coppersmith |
| − | |bgcolor="grey"| | + | | bgcolor="grey" | Striker<br> |
|- | |- | ||
| − | |bgcolor="red"|'''Tier 0.75''' | + | | bgcolor="yellow" | '''Tier 1''' |
| − | |bgcolor="grey"|Mallet | + | | bgcolor="grey" | |
| + | | bgcolor="grey" | Hammer | ||
| + | |- | ||
| + | | bgcolor="red" | '''Tier 0.75''' | ||
| + | | bgcolor="grey" | <br> | ||
| + | | bgcolor="grey" | Mallet<br> | ||
|} | |} | ||
| − | *[[ | + | === Damage Types<br> === |
| − | *[[Shields#Ship_Shields|Hephaestus Shield]] | + | |
| − | *[[Hephaestus | + | {| class="wikitable" |
| − | *[[ | + | |- |
| − | *[[Shields#Ship_Shields| | + | | bgcolor="orange" | '''Blazing''' |
| + | | bgcolor="grey" | Energy | ||
| + | |- | ||
| + | | bgcolor="red" | '''Burning''' | ||
| + | | bgcolor="grey" | Heat | ||
| + | |- | ||
| + | | style="background:yellow; color:black" | '''Flashing''' | ||
| + | | bgcolor="grey" | Laser | ||
| + | |- | ||
| + | | bgcolor="green" | '''Forging''' | ||
| + | | bgcolor="grey" | Mining | ||
| + | |- | ||
| + | | bgcolor="purple" | '''Glowing''' | ||
| + | | bgcolor="grey" | Radiation | ||
| + | |- | ||
| + | | bgcolor="blue" | '''Paring''' | ||
| + | | bgcolor="grey" | Surgical | ||
| + | |} | ||
| + | |||
| + | == Drops == | ||
| + | |||
| + | === Commodities === | ||
| + | |||
| + | *[[Commodities|Hephaestus Fragments]] | ||
| + | |||
| + | === Blueprints === | ||
| + | *[[Hephaestus Machine]] ([[Hephaestus Machine Blueprint|BP]]) | ||
| + | *[[Hephaestus Machine+]] ([[Hephaestus Machine+ Blueprint|BP]]) | ||
| + | *[[Hephaestus Research Module Blueprint]] | ||
| + | |||
| + | === Weapons === | ||
| + | |||
| + | *[[Weapons#Heat Weapons Weapons|Hephaestus' Burning Mallet]] ([[Hephaestus' Burning Mallet Blueprint|BP]]) | ||
| + | *[[Weapons#Heat Weapons Weapons|Hephaestus' Burning Hammer]] ([[Hephaestus' Burning Hammer Blueprint|BP]]) | ||
| + | *[[Weapons#Heat Weapons Weapons|Hephaestus' Burning Striker]] ([[Hephaestus' Burning Striker Blueprint|BP]]) | ||
| + | *[[Weapons#Heat Weapons Weapons|Hephaestus' Burning Maul]] ([[Hephaestus' Burning Maul Blueprint|BP]]) | ||
| + | *[[Weapons#Laser Weapons Weapons|Hephaestus' Flashing Mallet]] ([[Hephaestus' Flashing Mallet Blueprint|BP]]) | ||
| + | *[[Weapons#Laser Weapons Weapons|Hephaestus' Flashing Hammer]] ([[Hephaestus' Flashing Hammer Blueprint|BP]]) | ||
| + | *[[Weapons#Laser Weapons Weapons|Hephaestus' Flashing Striker]] ([[Hephaestus' Flashing Striker Blueprint|BP]]) | ||
| + | *[[Weapons#Laser Weapons Weapons|Hephaestus' Flashing Maul]] ([[Hephaestus' Flashing Maul Blueprint|BP]]) | ||
| + | *[[Weapons#Energy Weapons Weapons|Hephaestus' Blazing Mallet]] ([[Hephaestus' Blazing Mallet Blueprint|BP]]) | ||
| + | *[[Weapons#Energy Weapons Weapons|Hephaestus' Blazing Hammer]] ([[Hephaestus' Blazing Hammer Blueprint|BP]]) | ||
| + | *[[Weapons#Energy Weapons Weapons|Hephaestus' Blazing Striker]] ([[Hephaestus' Blazing Striker Blueprint|BP]]) | ||
| + | *[[Weapons#Energy Weapons Weapons|Hephaestus' Blazing Maul]] ([[Hephaestus' Blazing Maul Blueprint|BP]]) | ||
| + | *[[Weapons#Mining Weapons Weapons|Hephaestus' Forging Mallet]] ([[Hephaestus' Forging Mallet Blueprint|BP]]) | ||
| + | *[[Weapons#Mining Weapons Weapons|Hephaestus' Forging Hammer]] ([[Hephaestus' Forging Hammer Blueprint|BP]]) | ||
| + | *[[Weapons#Mining Weapons Weapons|Hephaestus' Forging Striker]] ([[Hephaestus' Forging Striker Blueprint|BP]]) | ||
| + | *[[Weapons#Mining Weapons Weapons|Hephaestus' Forging Maul]] ([[Hephaestus' Forging Maul Blueprint|BP]]) | ||
| + | *[[Weapons#Radiation Weapons Weapons|Hephaestus' Glowing Mallet]] ([[Hephaestus' Glowing Mallet Blueprint|BP]]) | ||
| + | *[[Weapons#Radiation Weapons Weapons|Hephaestus' Glowing Hammer]] ([[Hephaestus' Glowing Hammer Blueprint|BP]]) | ||
| + | *[[Weapons#Radiation Weapons Weapons|Hephaestus' Glowing Striker]] ([[Hephaestus' Glowing Striker Blueprint|BP]]) | ||
| + | *[[Weapons#Radiation Weapons Weapons|Hephaestus' Glowing Maul]] ([[Hephaestus' Glowing Maul Blueprint|BP]]) | ||
| + | *[[Weapons#Surgical Weapons Weapons|Hephaestus' Paring Mallet]] ([[Hephaestus' Paring Mallet Blueprint|BP]]) | ||
| + | *[[Weapons#Surgical Weapons Weapons|Hephaestus' Paring Hammer]] ([[Hephaestus' Paring Hammer Blueprint|BP]]) | ||
| + | *[[Weapons#Surgical Weapons Weapons|Hephaestus' Paring Striker]] ([[Hephaestus' Paring Striker Blueprint|BP]]) | ||
| + | *[[Weapons#Surgical Weapons Weapons|Hephaestus' Paring Maul]] ([[Hephaestus' Paring Maul Blueprint|BP]]) | ||
| + | |||
| + | === Expander === | ||
| + | *[[Hephaestus Expander]] | ||
| + | *[[Hephaestus Coppersmith Expander]] ([[Hephaestus Coppersmith Expander Blueprint|BP]]) | ||
| + | |||
| + | === Shields === | ||
| + | |||
| + | *[[Shields#Ship_Shields|Dented Hephaestus Shield]] | ||
| + | *[[Shields#Ship_Shields|Hephaestus Shield]]([[Hephaestus Shield|BP]]) | ||
| + | *[[Shields#Ship_Shields|Hephaestus Buckler]]([[Hephaestus Buckler|BP]]) | ||
| + | *[[Shields#Ship_Shields|Heavy Hephaestus Shield]]([[Heavy Hephaestus Shield|BP]]) | ||
| + | *[[Shields#Ship_Shields|Hephaestus Coppersmith Shield]]([[Hephaestus Coppersmith Shield|BP]]) | ||
| + | *[[Shields#Ship_Shields|Heavy Hephaestus Coppersmith Shield]]([[Heavy Hephaestus Coppersmith Shield|BP]]) | ||
| + | |||
| + | |||
| + | === Exterminators === | ||
| + | |||
| + | Fire Extinguisher 2 | ||
| + | |||
| + | === Augmenters === | ||
| − | + | *[[Augmenters#Olympus_Augmenters|Molten Fires of Hephaestus Augmenter]] | |
| + | *[[Augmenters#Olympus_Augmenters|Molten Fires of Hephaestus+ Augmenter]] ([[Molten Fires of Hephaestus+ Augmenter Blueprint|BP]]) | ||
| + | *[[Augmenters#Olympus_Augmenters|Hephaestus Skin Augmenter]] | ||
| − | + | == Testing == | |
| − | {{pic}} | + | {{pic}} {{gear}} |
| − | {{gear}} | ||
| − | [[Category: | + | [[Category:Uber_AI]] [[Category:Olympus]] |
| − | [[Category: Olympus]] | ||
Latest revision as of 00:27, 19 June 2020
Pretender Hephaestus is an uber AI resting in Forge of Hephaestus. To face him however you must first brave his three Cyclopian guards, Brontes, Arges and Steropes. Their ships were forged by Pretender Hephaestus himself and are out-fitted with powerful weapons - only those of fortitude may enter the forge.
The bright suns and many asteroids in this area make fighting him nearly impossible for stealth classes. Coupled with a big nasty chain laser-wielding drone on the sun, how can anyone possibly defeat him!?
Although Pretender Hephaestus is considered the weakest Olympus uber, Pretender Hephaestus is still hard, very hard, don't blink or you'll die several times over and get to watch from your pod as he melts your ship down to scrap and reforges the Cyclopian guards you killed to fight him - coincidentally, Steropes mentions this very thing right before he dies!
Some of the features of Pretender Hephaestus' home include his very own Hephaestus Forged Overloaders; these are decay-on-warp overloaders that can be mined from the inner asteroid belt. They're extremely powerful, and well worth the investment of time to mine, however they aren't necessary to kill Pretender Hephaestus. If you instead want to challenge a mini Cyclopes, then you need to mine in the outer asteroid belt, you may even find some bronze while you're getting butchered by them!
Contents
Stages
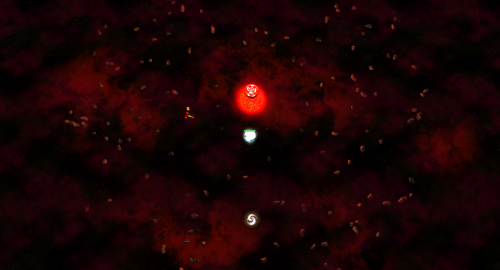
Stage 1
"Hephaestus" upon entering.

|
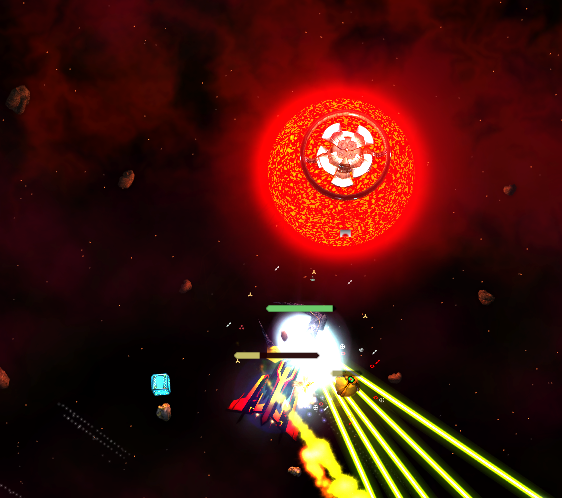
Stage 2
75%: "Hephaestus" in his second form, deploying Unstable Hephaestus Drones.

|
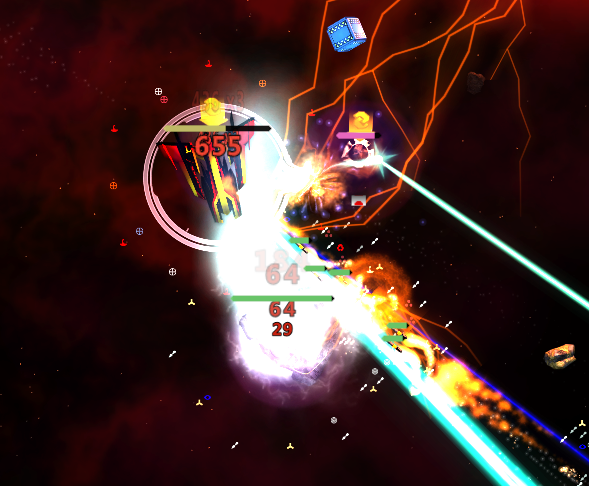
Stage 3
50%: "Hephaestus" in his third form with a new chain laser.

|
Stage 4
25%: "Hephaestus" in his final form.

|
Gear
Tiers
| Heavy | Oversized |
| Normal | |
| ? | Miniature |
| Tier 3 | ? | Maul |
| Tier 2 | Coppersmith | Striker |
| Tier 1 | Hammer | |
| Tier 0.75 | |
Mallet |
Damage Types
| Blazing | Energy |
| Burning | Heat |
| Flashing | Laser |
| Forging | Mining |
| Glowing | Radiation |
| Paring | Surgical |
Drops
Commodities
Blueprints
Weapons
- Hephaestus' Burning Mallet (BP)
- Hephaestus' Burning Hammer (BP)
- Hephaestus' Burning Striker (BP)
- Hephaestus' Burning Maul (BP)
- Hephaestus' Flashing Mallet (BP)
- Hephaestus' Flashing Hammer (BP)
- Hephaestus' Flashing Striker (BP)
- Hephaestus' Flashing Maul (BP)
- Hephaestus' Blazing Mallet (BP)
- Hephaestus' Blazing Hammer (BP)
- Hephaestus' Blazing Striker (BP)
- Hephaestus' Blazing Maul (BP)
- Hephaestus' Forging Mallet (BP)
- Hephaestus' Forging Hammer (BP)
- Hephaestus' Forging Striker (BP)
- Hephaestus' Forging Maul (BP)
- Hephaestus' Glowing Mallet (BP)
- Hephaestus' Glowing Hammer (BP)
- Hephaestus' Glowing Striker (BP)
- Hephaestus' Glowing Maul (BP)
- Hephaestus' Paring Mallet (BP)
- Hephaestus' Paring Hammer (BP)
- Hephaestus' Paring Striker (BP)
- Hephaestus' Paring Maul (BP)
Expander
Shields
- Dented Hephaestus Shield
- Hephaestus Shield(BP)
- Hephaestus Buckler(BP)
- Heavy Hephaestus Shield(BP)
- Hephaestus Coppersmith Shield(BP)
- Heavy Hephaestus Coppersmith Shield(BP)
Exterminators
Fire Extinguisher 2
Augmenters
- Molten Fires of Hephaestus Augmenter
- Molten Fires of Hephaestus+ Augmenter (BP)
- Hephaestus Skin Augmenter